I created this tutorial for the TC forums, but I also thought it would be usefull here. 
Skinners use shadow kits to bring out the features in our skins. A shadow kit darkens or lightens areas of your skin to make them more realistic by multiplying the default skin on top of the skin. Btw, a shadow kit and a bodykit are NOT the same.
Step 1, Download the shadow kits:
Thanks to Riders Motion
http://www.lfsforum.net/showthread.php?p=689545#post689545
For Single Seaters:
Thanks to XCNuse: http://www.lfsforum.net/showthread.php?t=23675
you can use those above, but I find them a bit too dark. You can use the default skins instead. Some Pro-Kits include them
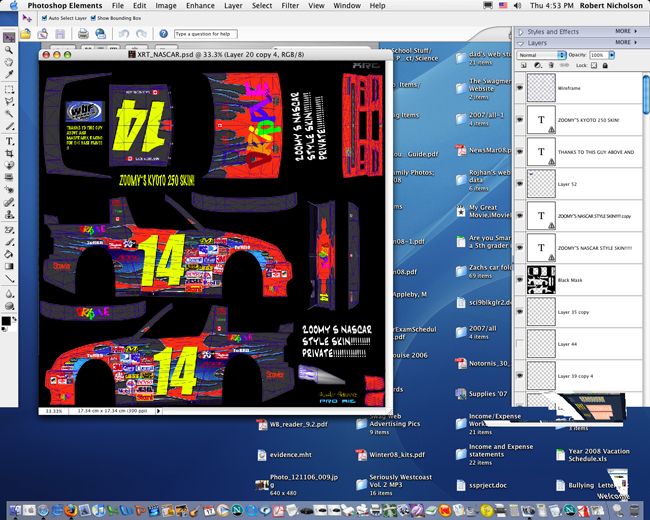
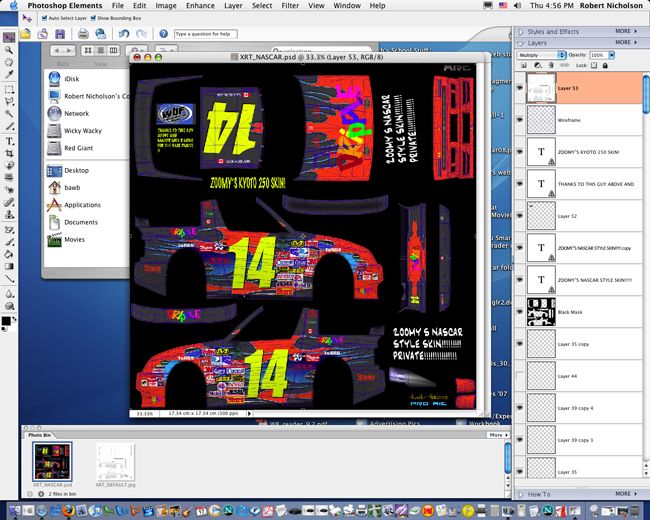
Step 2, open your skin. It should looks something like this.
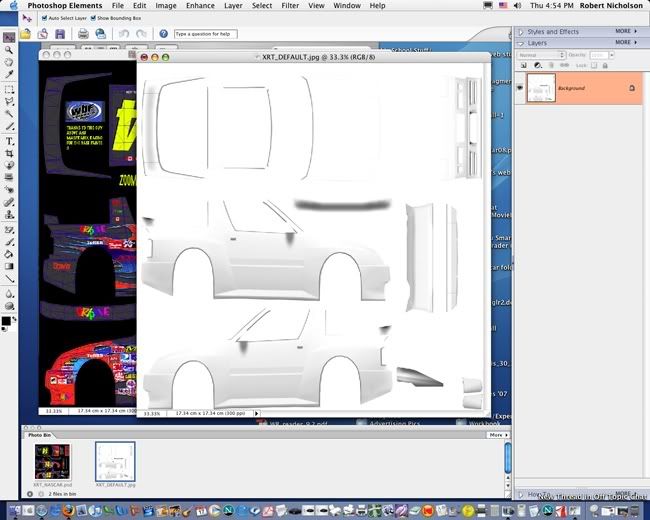
Step 3, open your shadow kit. It should look something like this:
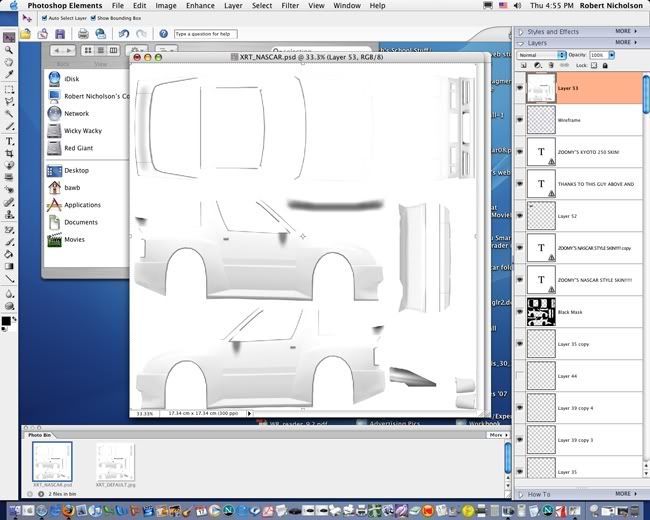
Step 3: Select all (control-A) and then copy (control-C). then click back to your skin, and select the very top layer. (doesn't matter what it is). Then paste (control-P) the shadow kit on top. It should look like this:
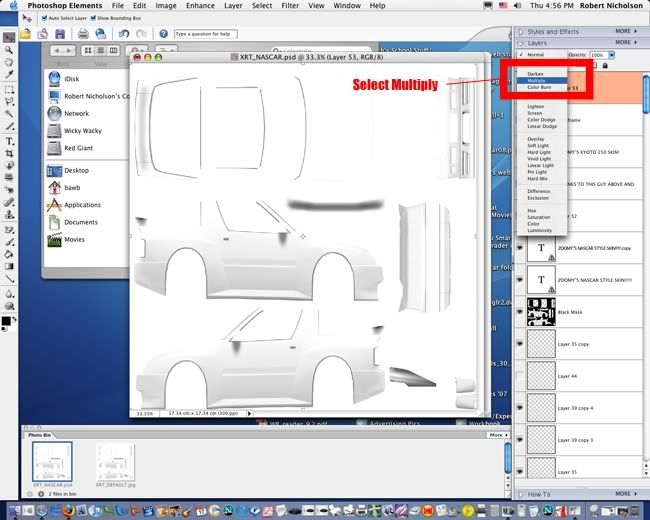
Step 4, Select the shadow kit layer and click the menu above the layers and select "multiply"
Step 5, your skin should now look like this:
If you want to apply tweaks to other parts of your skin, you must click the eye icon on the layer and make that layer invisible. don't forget to make it visible again when you are done.
And when you are all done the skin and ready for release, remove the wireframe and save in 2048x2048. If you wish to resize to 1024x1024, open your saved JPG skinfile and resize it that way. If you resize the .PSD, all of the decals go out of shape.
Hope this guide helped.
If you have any comments or spot a spelling or grammer mistake :S, please post
Skinners use shadow kits to bring out the features in our skins. A shadow kit darkens or lightens areas of your skin to make them more realistic by multiplying the default skin on top of the skin. Btw, a shadow kit and a bodykit are NOT the same.
Step 1, Download the shadow kits:
Thanks to Riders Motion
http://www.lfsforum.net/showthread.php?p=689545#post689545
For Single Seaters:
Thanks to XCNuse: http://www.lfsforum.net/showthread.php?t=23675
you can use those above, but I find them a bit too dark. You can use the default skins instead. Some Pro-Kits include them
Step 2, open your skin. It should looks something like this.
Step 3, open your shadow kit. It should look something like this:
Step 3: Select all (control-A) and then copy (control-C). then click back to your skin, and select the very top layer. (doesn't matter what it is). Then paste (control-P) the shadow kit on top. It should look like this:
Step 4, Select the shadow kit layer and click the menu above the layers and select "multiply"
Step 5, your skin should now look like this:
If you want to apply tweaks to other parts of your skin, you must click the eye icon on the layer and make that layer invisible. don't forget to make it visible again when you are done.
And when you are all done the skin and ready for release, remove the wireframe and save in 2048x2048. If you wish to resize to 1024x1024, open your saved JPG skinfile and resize it that way. If you resize the .PSD, all of the decals go out of shape.
Hope this guide helped.
If you have any comments or spot a spelling or grammer mistake :S, please post


